


In finishing up my Baba Yaga project, I’ve been working on some miniature root veggies and pumpkins to arrange around the yard. After playing around with different methods for making tiny turnips, I’ve put together a quick tutorial for you–enjoy!
Supplies
- polymer clay in white and translucent
- liquid translucent clay
- white thread
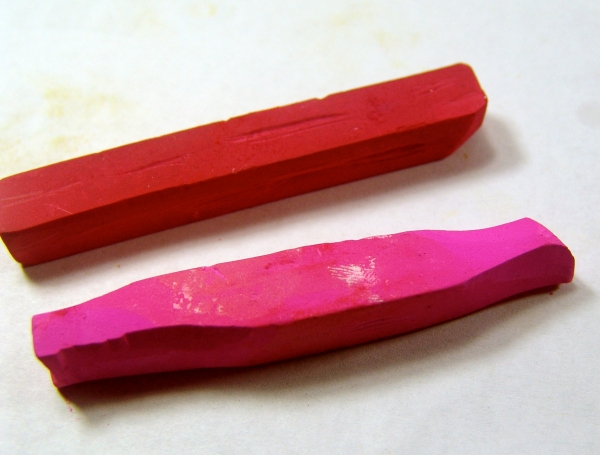
- chalk pastels in purplish-pink, tan, and brown
- metal pastry tips (I used sizes #6, 7 and 10)
- razor blade or clay knife
- paint brushes
- toothpicks
- satin polymer clay varnish (optional)
Instructions
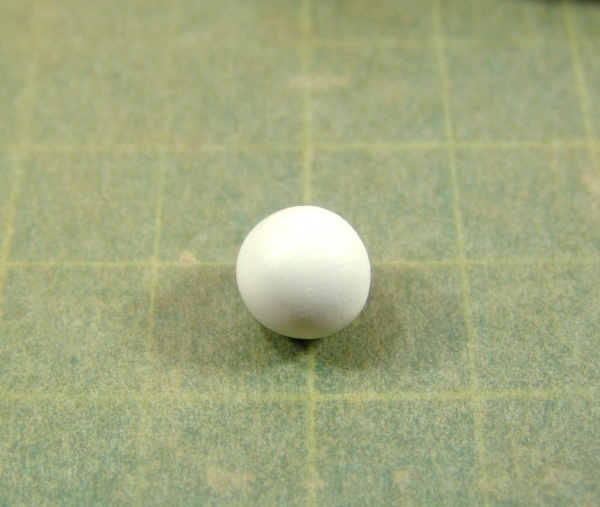
Prepare your turnip clay by mixing equal parts white and translucent clay, kneading to combine thoroughly.

Roll the clay out into little balls, from 3/8″ in diameter to a bit smaller or larger to vary the size of your turnips.
Snip little pieces of thread in varying lengths, from 3/8″ long to a bit shorter. You’ll need three or four pieces for each turnip.
Roll out a short snake of turnip clay as shown.

Roll the snake of clay onto the thread, one piece at a time, to attach and partially embed the threads along the length of the clay. Make sure at least one of the threads is sticking out at the bottom of the clay snake, like a thin root tendril.
If necessary, gently roll the snake of clay against your work surface to form one end into a pointy tip, then attach the snake to the turnip ball. You can use the side of a needle tool to smooth away the seam between the snake and the ball.

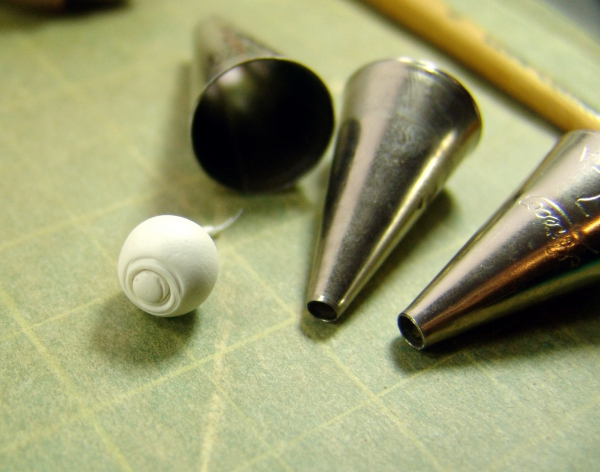
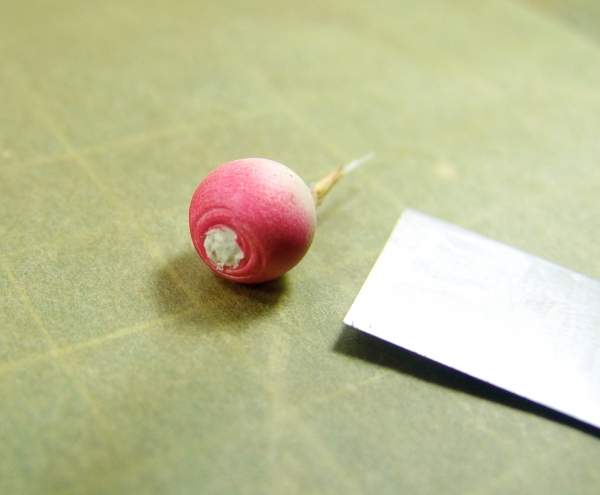
Use metal pastry tips to press concentric circles on the top of the turnip.
Grate pinkish purple and pink chalk pastels into a powder with a razor blade, and use a dry paint brush to tint the top of the turnip. I like to use the brighter pink first, then deepen the color with the maroon-pink. Use a light hand; a little color goes a long way.
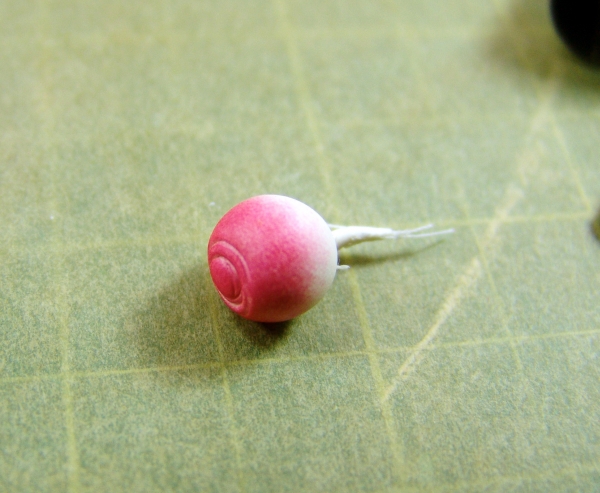
Using the same process, tint the bottom half with a very light tan. You can leave some spots bare white for natural variation.

Use the corner of the razor blade to chip away the clay within the innermost circle on the top of the turnip.
Use a small, moistened paint brush to tint this area with tans and browns. Add hints of browns inside the grooves of the other circles.
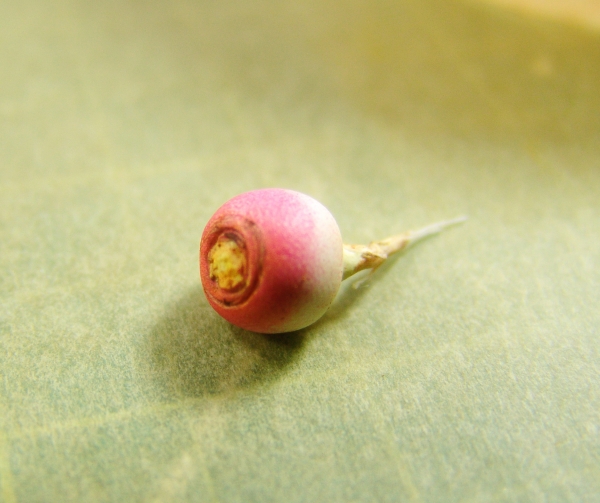
Use the same paint brush to add color to the root tip.
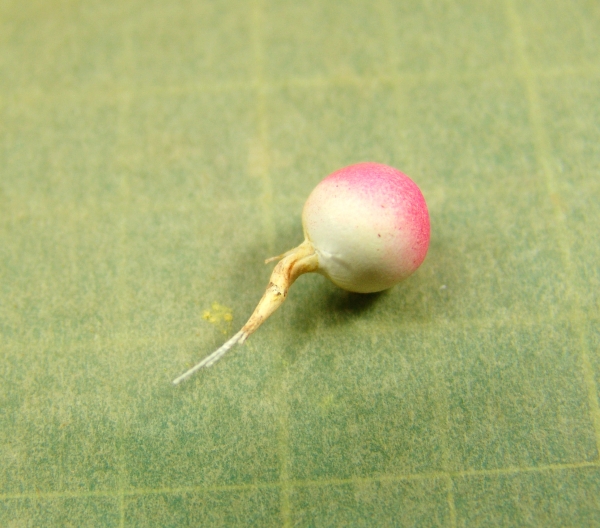
Use a toothpick to take up a dab of translucent liquid clay and coat the white threads. Switch to a paint brush, and tint the threads with chalk pastels in tans and browns. When you place the turnip on your baking tile, you can arrange the threads with a toothpick if needed to ensure they’re not clumped together.

Use a needle tool to create a few scratches, giving the turnip a more natural, marred appearance. Then, bake in a preheated oven at the temperature specified on your clay package for twelve minutes.

It’s up to you whether you choose to varnish the finished turnips or not. Some clays bake with a slight sheen to them, and in that case, I’d leave them bare, but if you feel like the turnip is too flat and dull, add just the tiniest hint of satin polymer clay varnish. Anything more and the turnip will look unnaturally shiny.
Have fun!
Want more tiny food tutorials? Check out my entire library, available for instant download.
August 11, 2017 at 4:26 pm
I never thought I would look at a turnip and think of anything more than just food (I’ve loved them raw ever since I was a kid), but this little guy is flippin’ ADORABLE! <3
You are amazing, dearest Mo. 🙂
August 12, 2017 at 5:53 pm
It’s perfect! They look like you could bite into them. Thank you for the tutorial.
August 12, 2017 at 8:51 pm
The Tiny Turnips look real and ready to enjoy in a meal. Just haven’t worked on any miniatures this year, too many other things going on, perhaps next year.
Thanks,
Carolyn
August 12, 2017 at 11:45 pm
Thank you so much for this tutorial! You make it look so easy, can’t wait to try them!!!
September 24, 2017 at 1:08 am
😉 Why, thank you, Deb!
September 24, 2017 at 1:09 am
Thanks, Diane!
September 24, 2017 at 1:09 am
Thanks, Carolyn! I hope you’re able to get some time for fun mini making soon. 🙂
September 24, 2017 at 1:10 am
Sure thing–have fun! 🙂
November 19, 2017 at 9:18 pm
Thanks so much for your fabulous tutorial, I will be doing this with the help of your tutorial.
November 29, 2017 at 2:46 pm
Thanks, Dana! Have fun mini making. 😀
March 18, 2019 at 3:08 am
I was looking for clay turnip inspiration and was very happy to stumble across your full tutorial instead! I just made two dozen of them and your instructions are perfect. Thank you very much for sharing 🙂
March 18, 2019 at 12:41 pm
I’m so glad the tutorial was useful, Helen! 🙂