


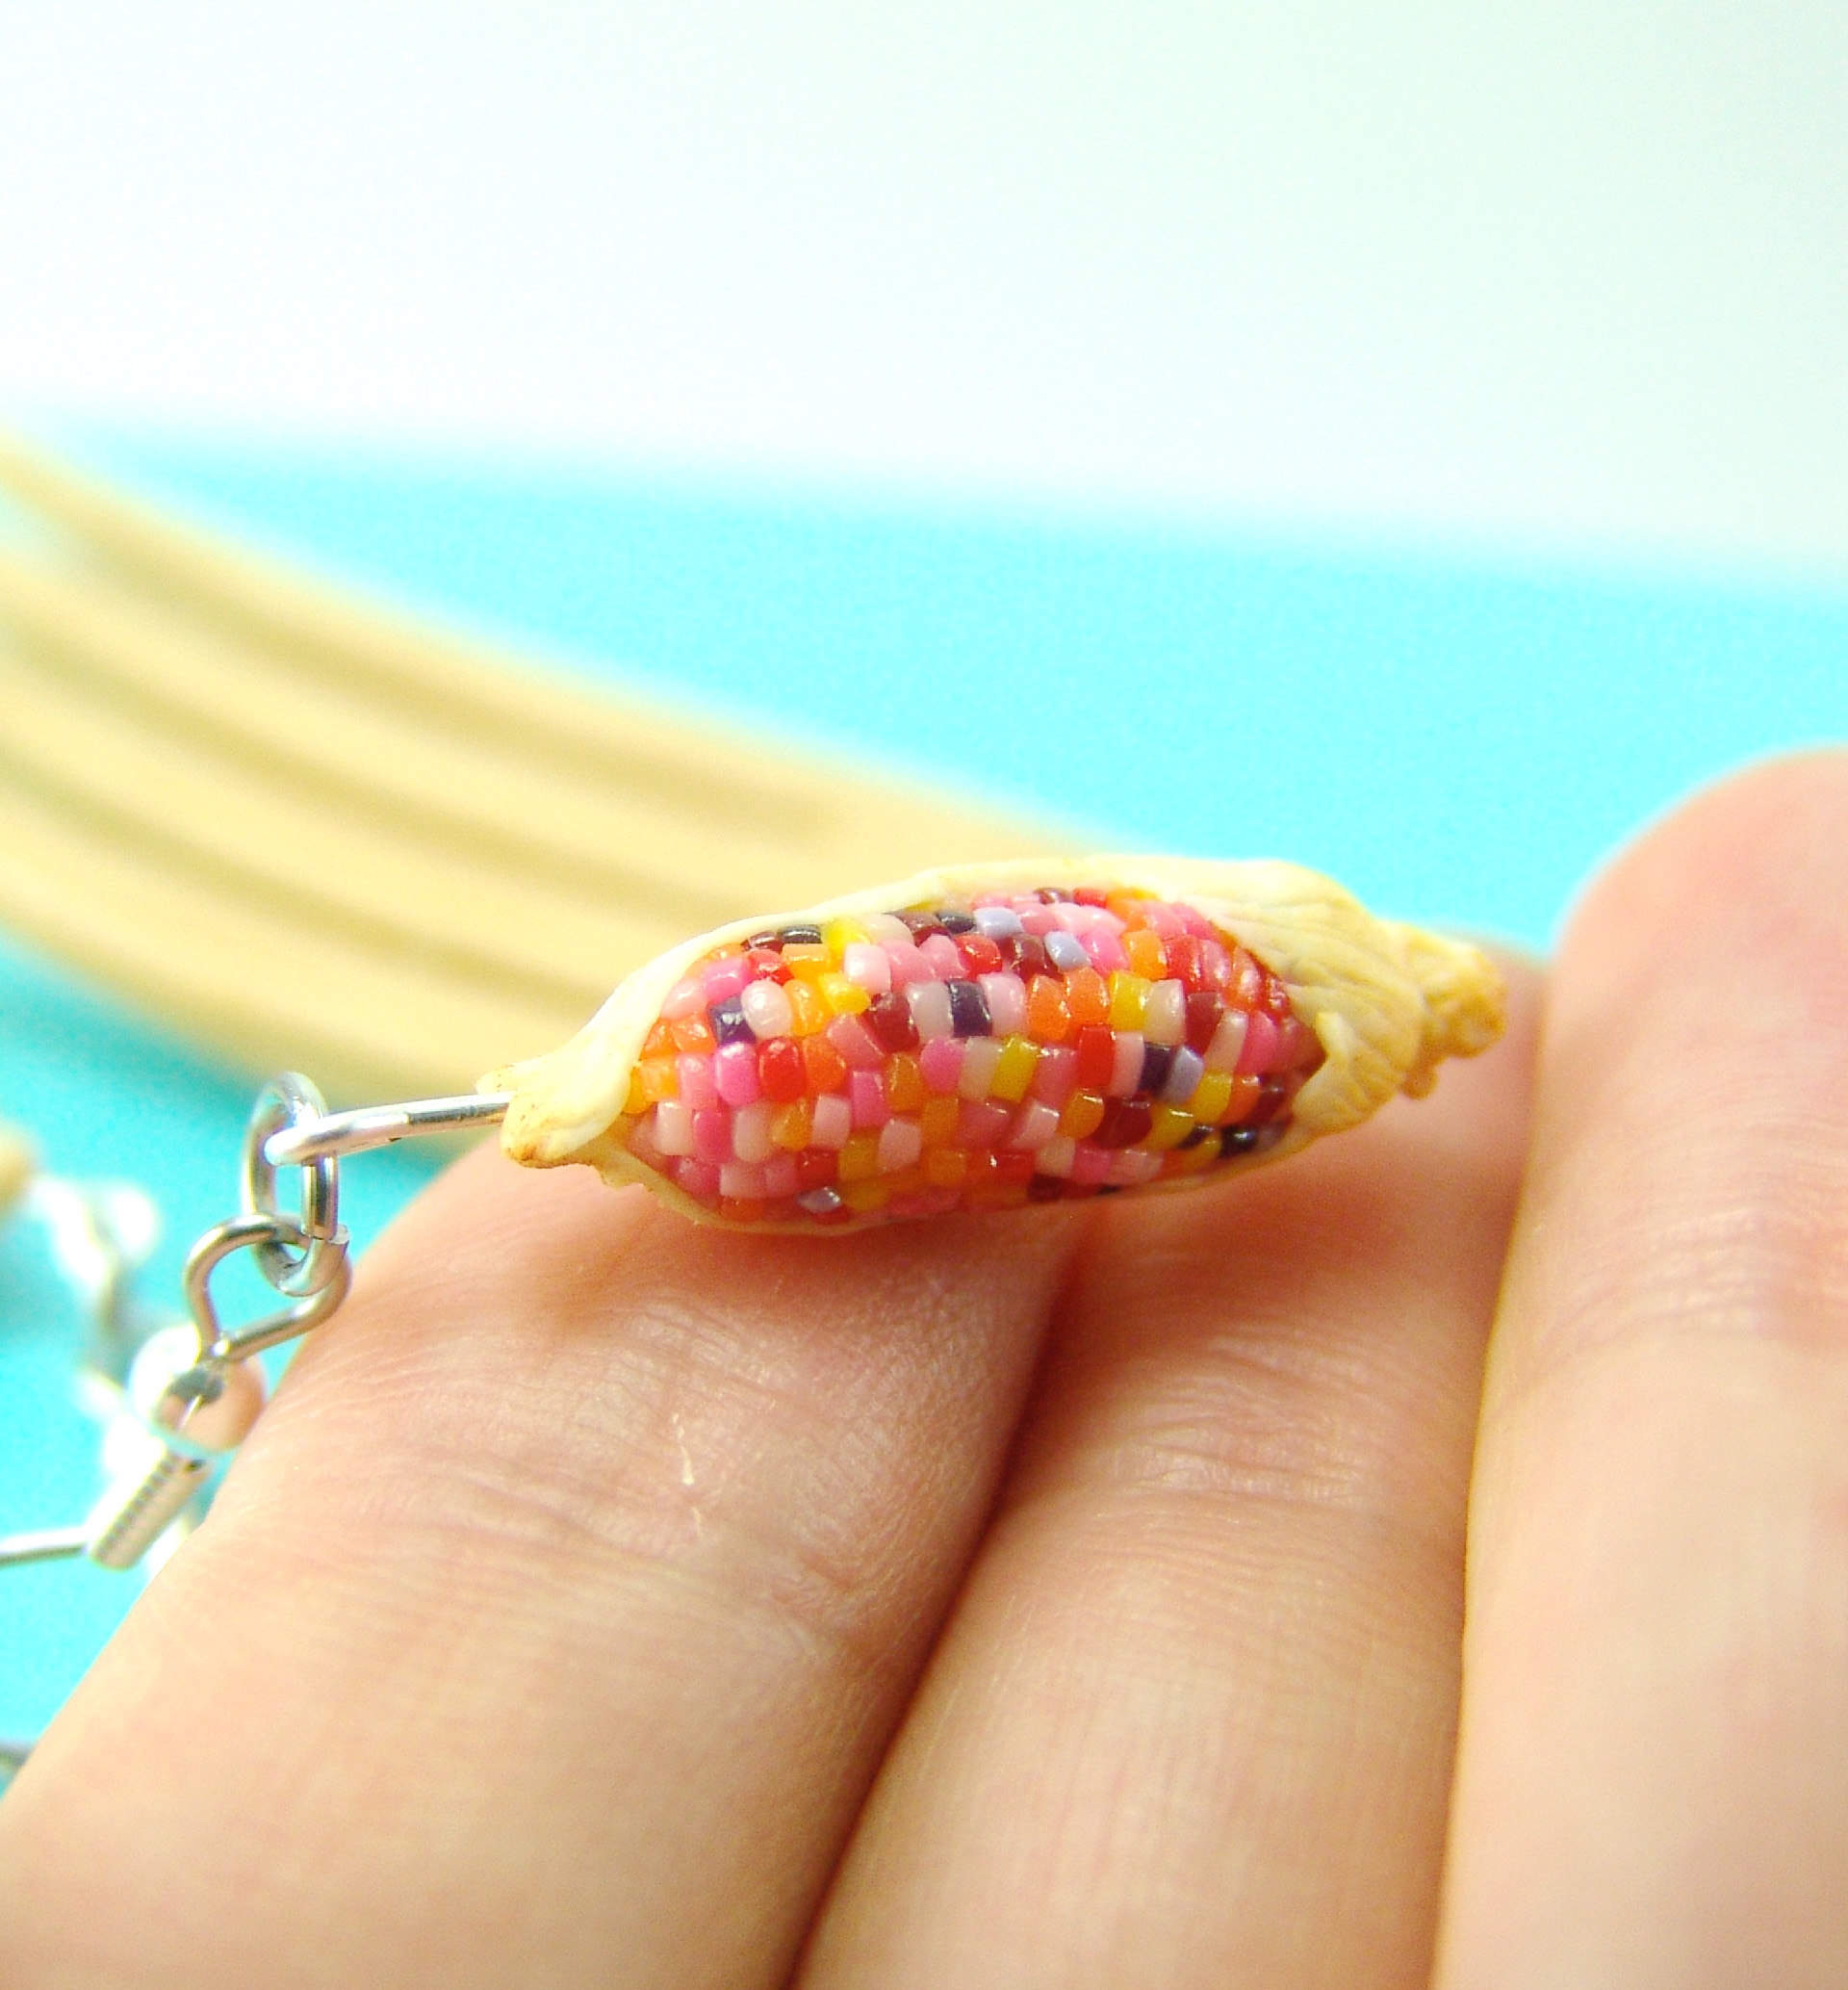
I want to show you how to make tiny glass gem corn today, because it’s just so darn pretty, but first a bit of studio news: The mice and I (and my husband!) are moving to our first house.
We’ll be moving over Memorial Day weekend, and by next week I’ll have my new studio set up. Mostly. Now that we have more space, I have plans to gradually put together the studio I’ve always dreamed of, but one step at a time. Just being in a new room will be a nice change of pace. 🙂
All right, on to the tiny corn!
There are so many beautiful variations of glass gem corn, so before you choose your clay colors, check out this Google image search and pick your favorite variety to miniaturize.
Then, prepare your clay colors. You’ll likely have to do some mixing of out-of-the-package colors, but work off of a photo of real glass gem corn and do your best to mimic as many shades as possible. The more color variety, the prettier the end result. Here are the colors I chose:

Mix each color with translucent clay in a ratio of one part colored clay to three parts translucent. This will give the finished kernels a nice, glassy look, especially once they’re varnished.
Roll each color out into a thin snake.
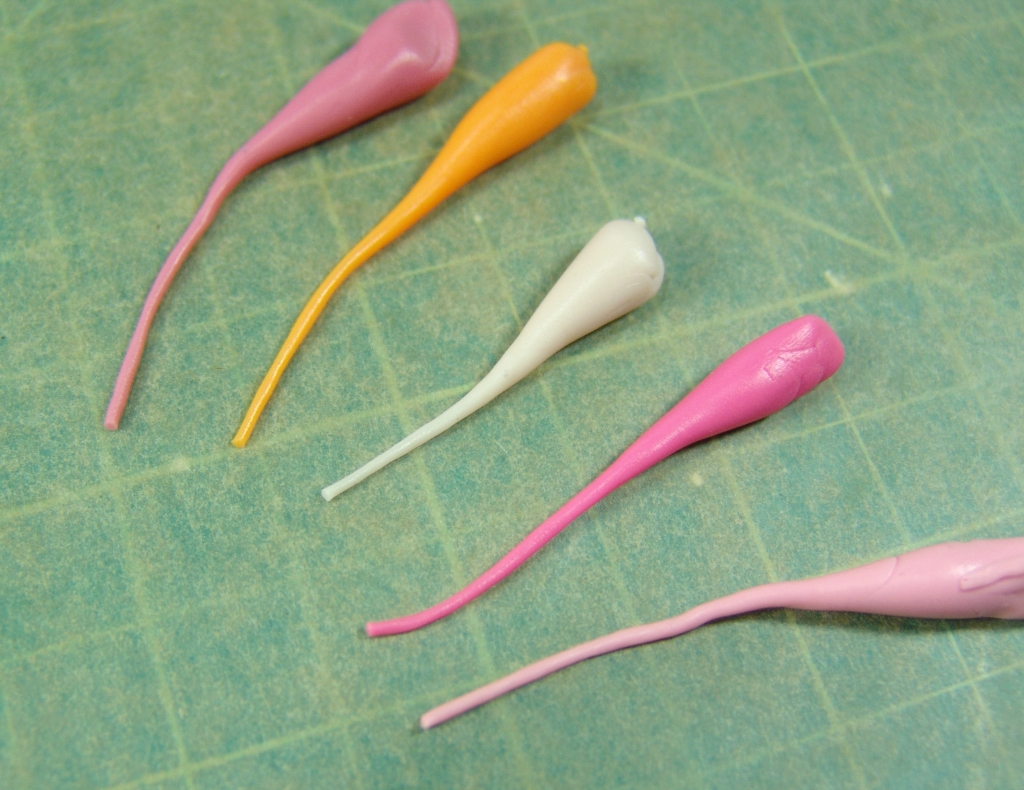
Use a sharp blade to cut off small pieces from all of the different colors. I use a long clay blade, and I leave the clay pieces stuck to the blade until I’m ready to use them. It’s a bit tricky to explain but easy to do: Cut your first clay bit with the very top of the blade’s cutting edge. Move down the blade just a smidge and cut your next clay bit, and continue on, moving down the length of the blade for each cut. When you’re done, all of your clay bits will be lined up along the edge of the blade, ready to use.
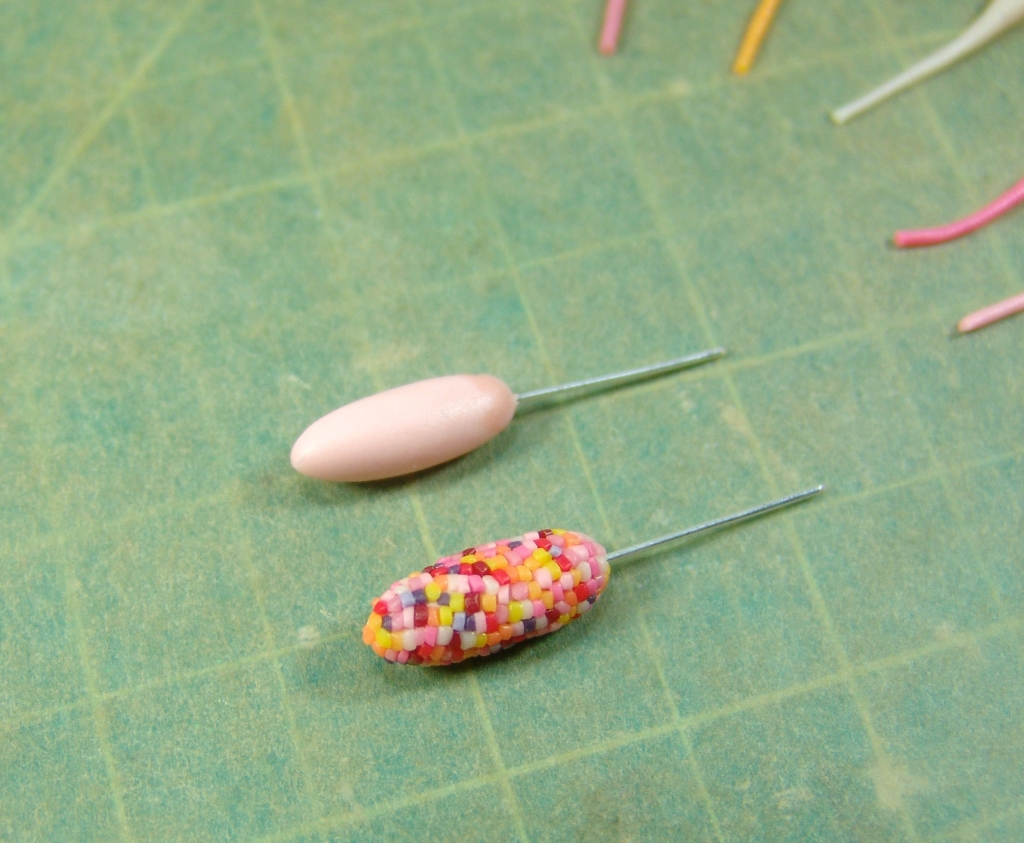
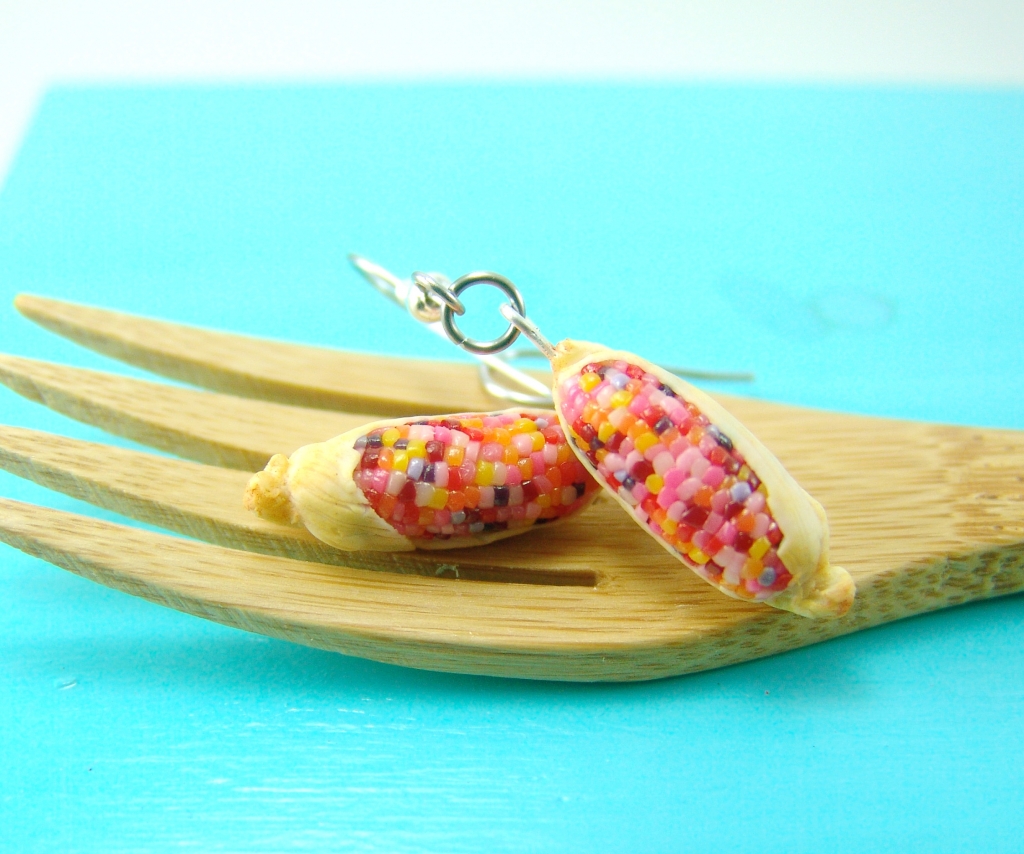
Use a bit of light colored clay to form the base of the cob, the piece that you’ll be attaching all of the kernels to. The shape is like an elongated football. If you’re making earrings, insert a headpin through the length of the football. I like to reform the clay around the head of the pin, sealing it inside the cob, as you can see in the photo below.
Then, start attaching your kernels. This is a pretty painstaking process, I’ll admit. Take up a kernel on your finger, and press it lightly in place. Continue, kernel by kernel, to form rows of variegated colors. Keep in mind that you’ll be wrapping part of the cob in husk, so you don’t have to cover the entire surface with kernels–thank heavens!
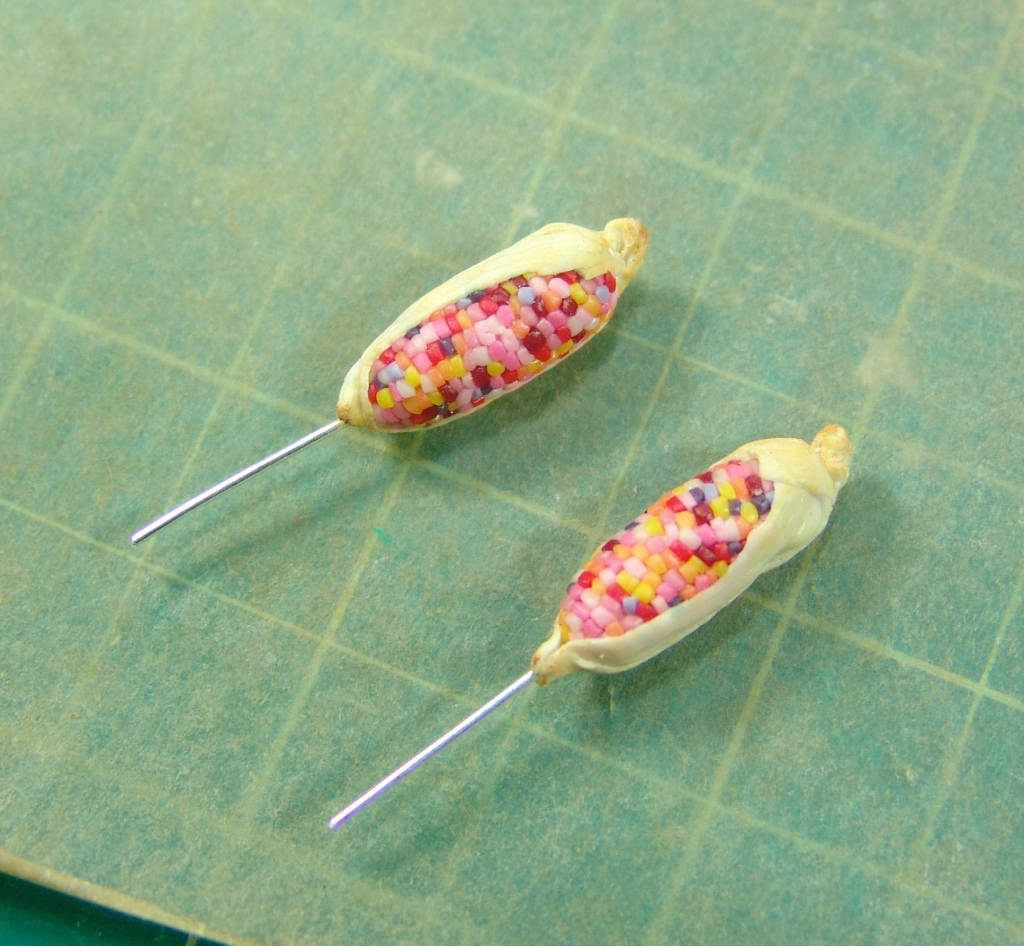
Mix one part light tan clay with one part translucent clay for the husk. Roll it out into a papery thin sheet and tear off pieces of clay to create interesting texture on the edges of the piece. Then, partially wrap the cob in husk. I used a needle tool to scrape shallow lines along the length of the husk to give it a natural-looking, ribbed texture. You can also shape the husk into a piece of stem at the base.
Use chalk pastel pigment in tan and light brown, grated with a razor blade to form loose chalk, and applied with a dry paint brush to tint the husk.
Bake in a preheated oven at the temperature indicated by the clay manufacturer for fifteen minutes. Once cool, varnish the kernels only with glossy polymer clay varnish.
If you made jewelry pieces, you can trim the headpins, if necessary, so roughly 1/2″ is protruding from the top of the corn. Then, use needle nose pliers to bend the headpin into a closed loop. You can now attach a jumpring and earrings wires to this loop.
Want to order the earrings instead of making a bazillion tiny kernels yourself? Get them here.
May 24, 2017 at 5:27 pm
Congratulations, dear Mo! Are you excited beyond reason? I sure was, no more giving away your hard-earned $$ to a Landlord, and no more intrusion when they want to show your house/apartment to other prospective Leasees. That alone was a huge deal for me…Privacy FTW! 😀 How wonderful for both of you. 🙂
Oh, girl…that corn is too adorable. I’m so making some of this for Fall decs in my ‘other house’! 😉 But just the thought of applying all of those little tiny bits (and trying to keep a straight row because yes, I am that anal) using my fingers makes my BP start to rise. Google it: Sticky jewel picker tool.
Saved by the sticky! 😀
Have fun this weekend and don’t forget to lift with your knees.
May 24, 2017 at 5:58 pm
Oh my goodness good luck on the move and for your studio I will ve getting more mousey things love your shop
May 25, 2017 at 12:50 am
How exciting to move into your own house and more room for your crafting is always a plus. Nice tutorial too.
July 21, 2017 at 6:21 pm
We love the new house! (And have been totally consumed by it, judging by how long it’s taken me to reply to your comment. 😉 )
And ooh la la! Thanks for the sticky jewel picker tool recommendation–love it!!
July 21, 2017 at 6:22 pm
Thank you, Jeanne! 😀
July 21, 2017 at 6:22 pm
Thanks, Diane! It’s soooo wonderful to have a roomier studio. As tiny as my work materials are, they still manage to take up a lot of space! 😉