These frosted cookies are fun and easy to make, and you can mix up your frosting and sprinkles colors however you like!
Prefer to get the already made cookies?
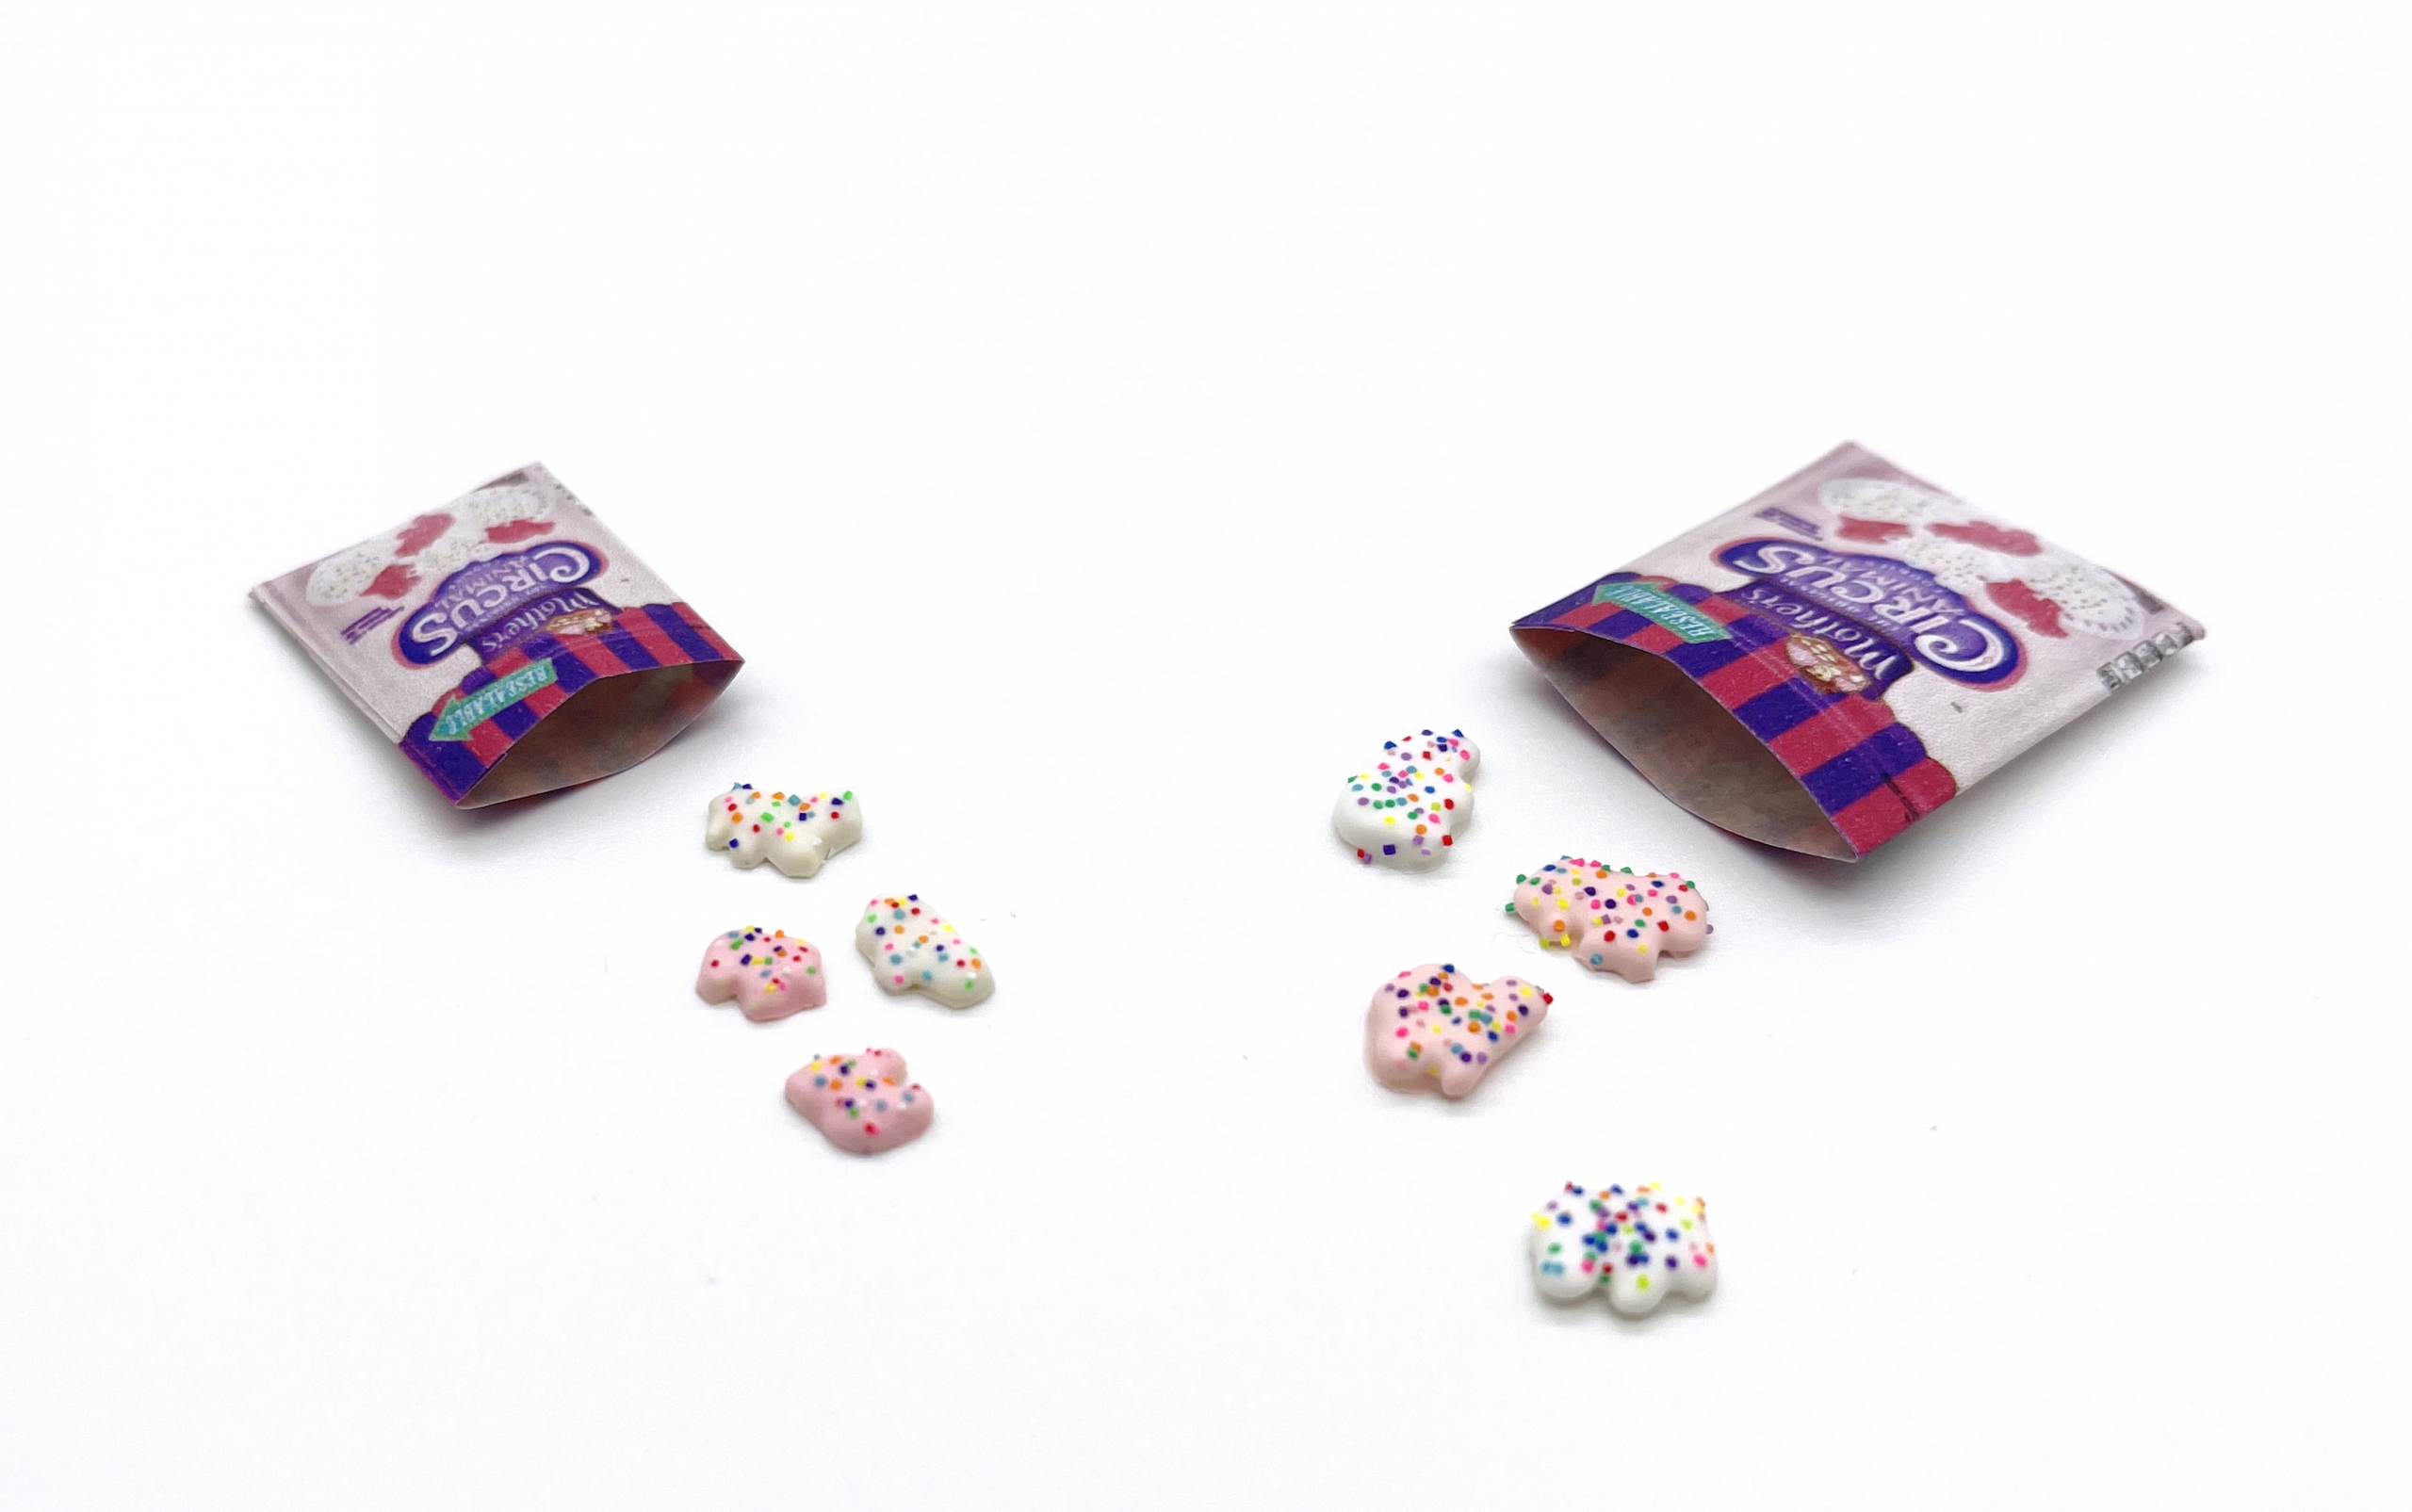
I have one only set in each scale, in both Halloween and pink/white circus animals:
Halloween cookie set in 1:6 scale
Halloween cookie set in 1:12 scale
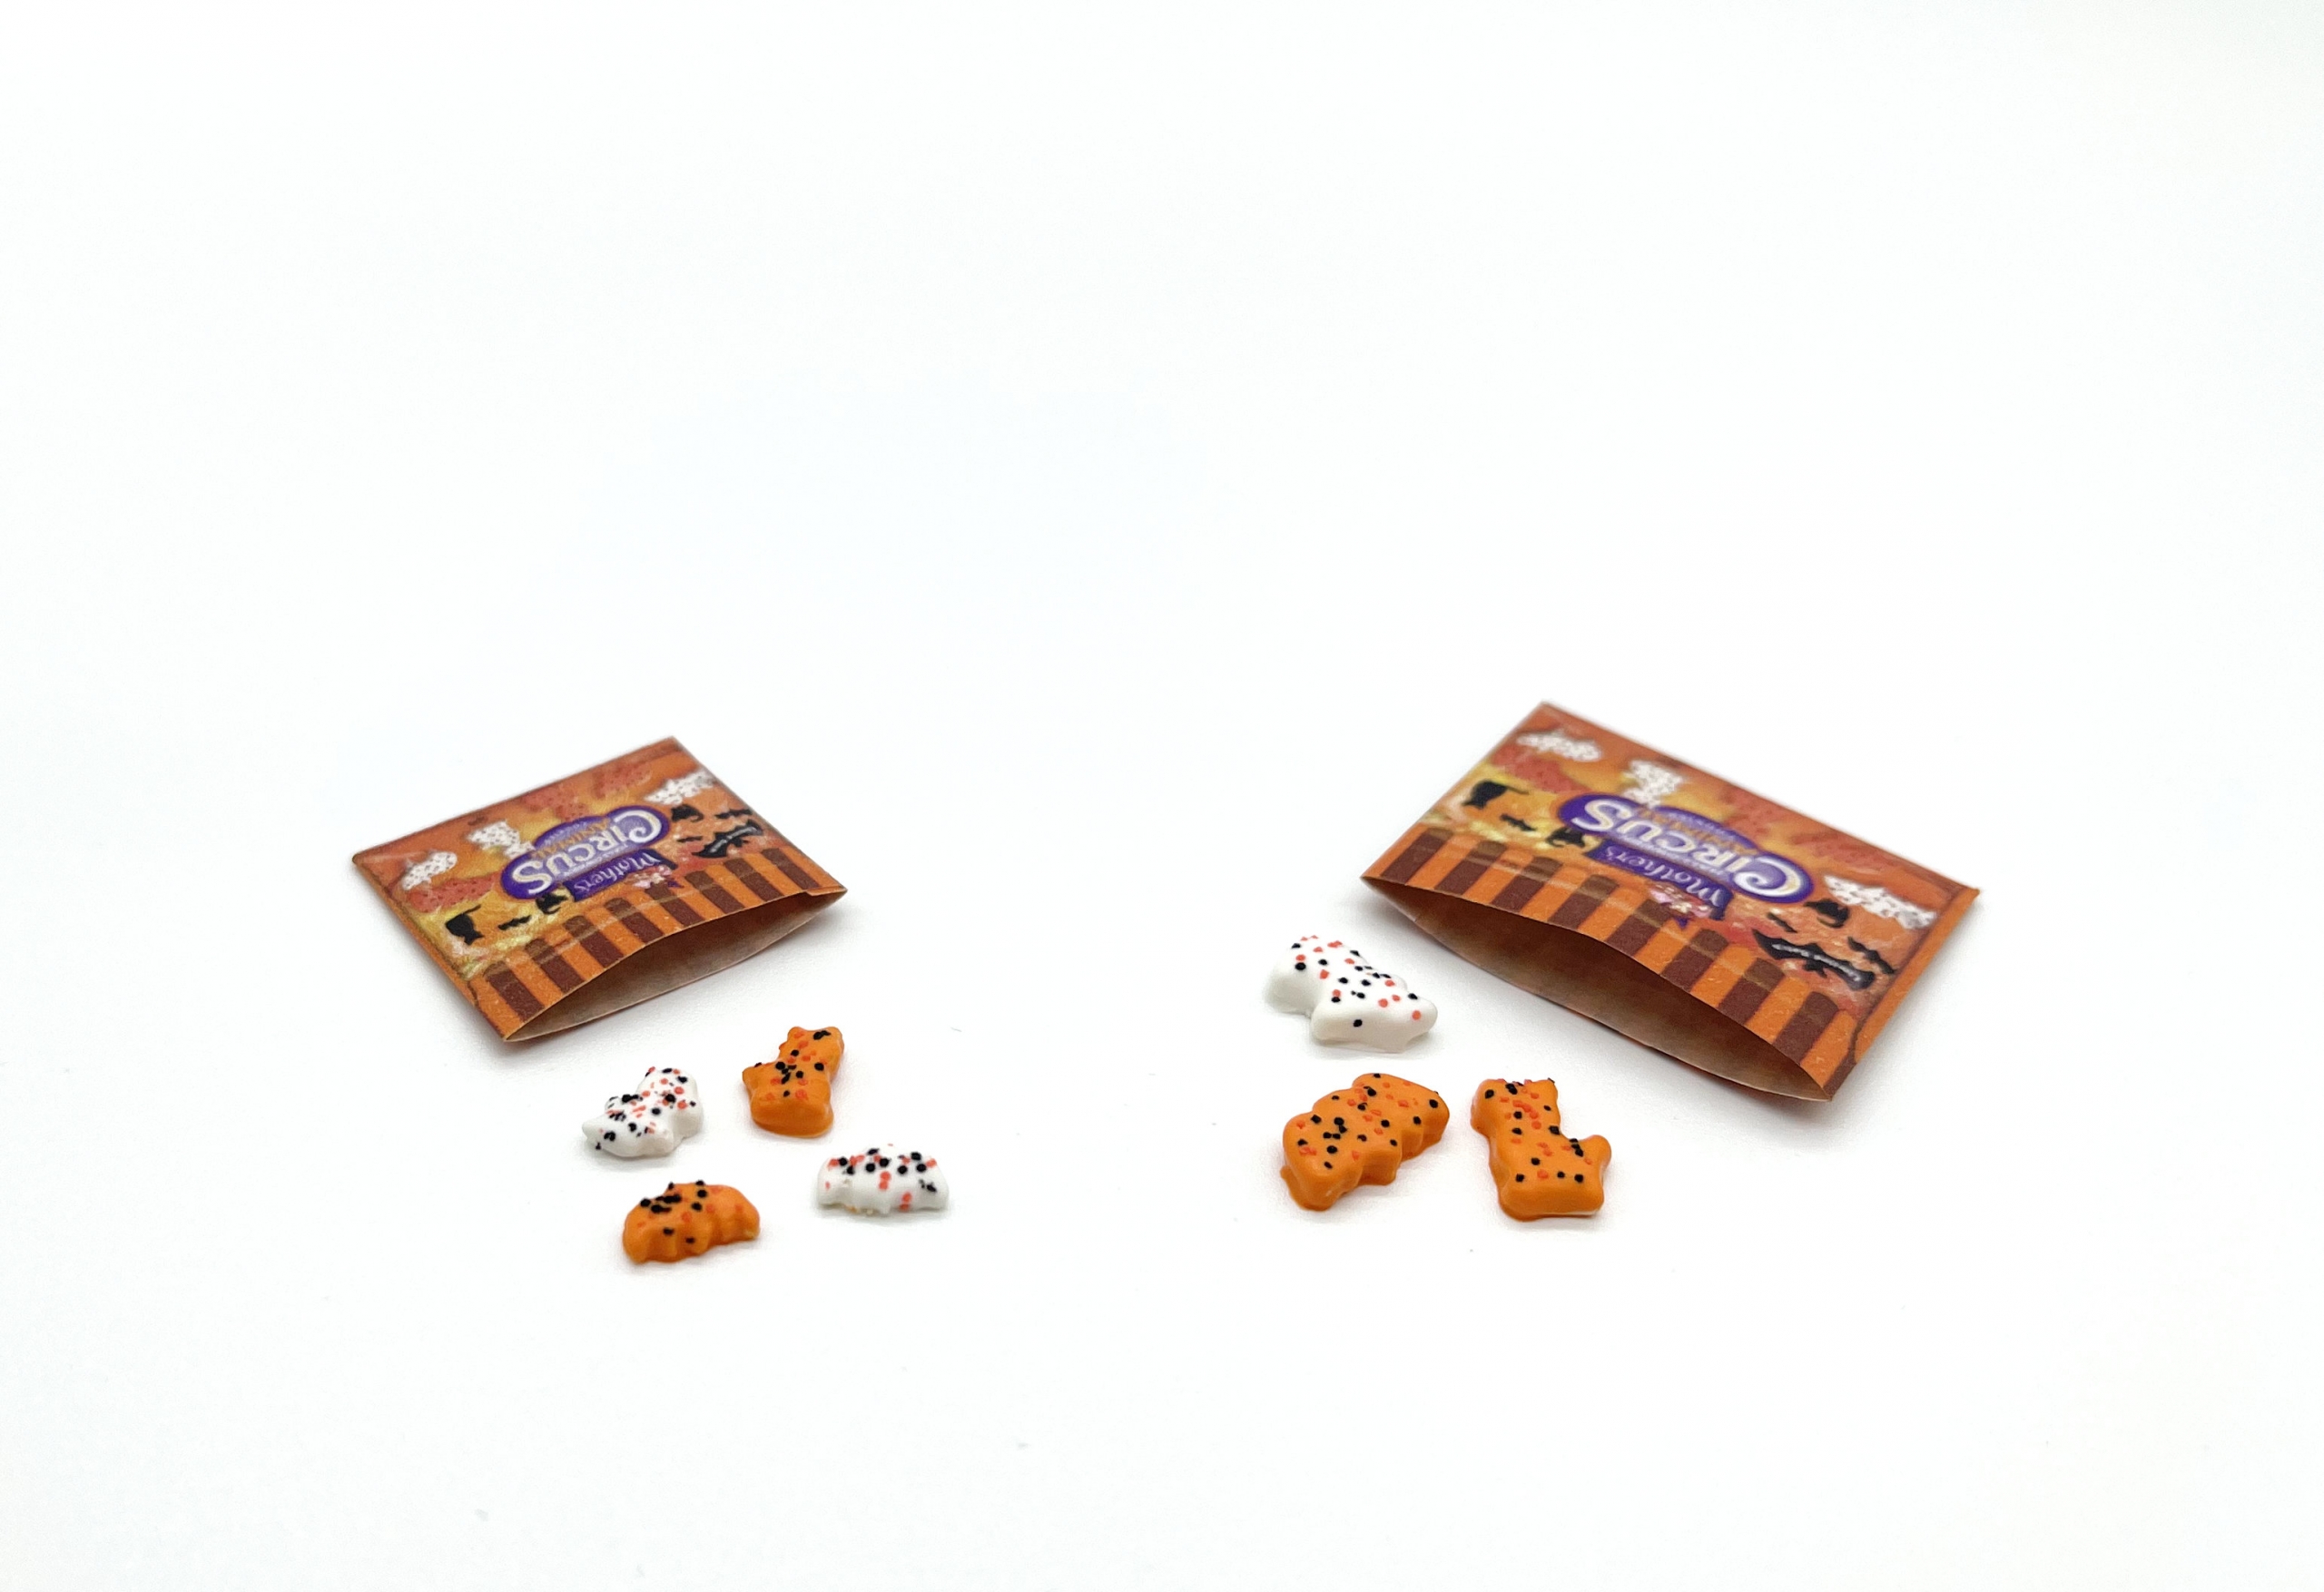
Circus cookie set in 1:6 scale
Circus cookie set in 1:12 scale
Below, I’m outlining how to make the Halloween version, but you can also use my circus animal cookie molds (1:12 scale or 1:6 scale) to make the pink and white cookies with the same method.
What you’ll need:
- polymer clay colors of your choice for the sprinkles
- white clay
- translucent liquid clay
- small bowl (reserved for craft use)
- wooden popsicle stick
- chalk pastels in the colors of your choice for the frosting
- razor blade
- Halloween cookie mold (1:12 scale or 1:6 scale)
- toothpicks
- ceramic baking tile
Make the sprinkles:
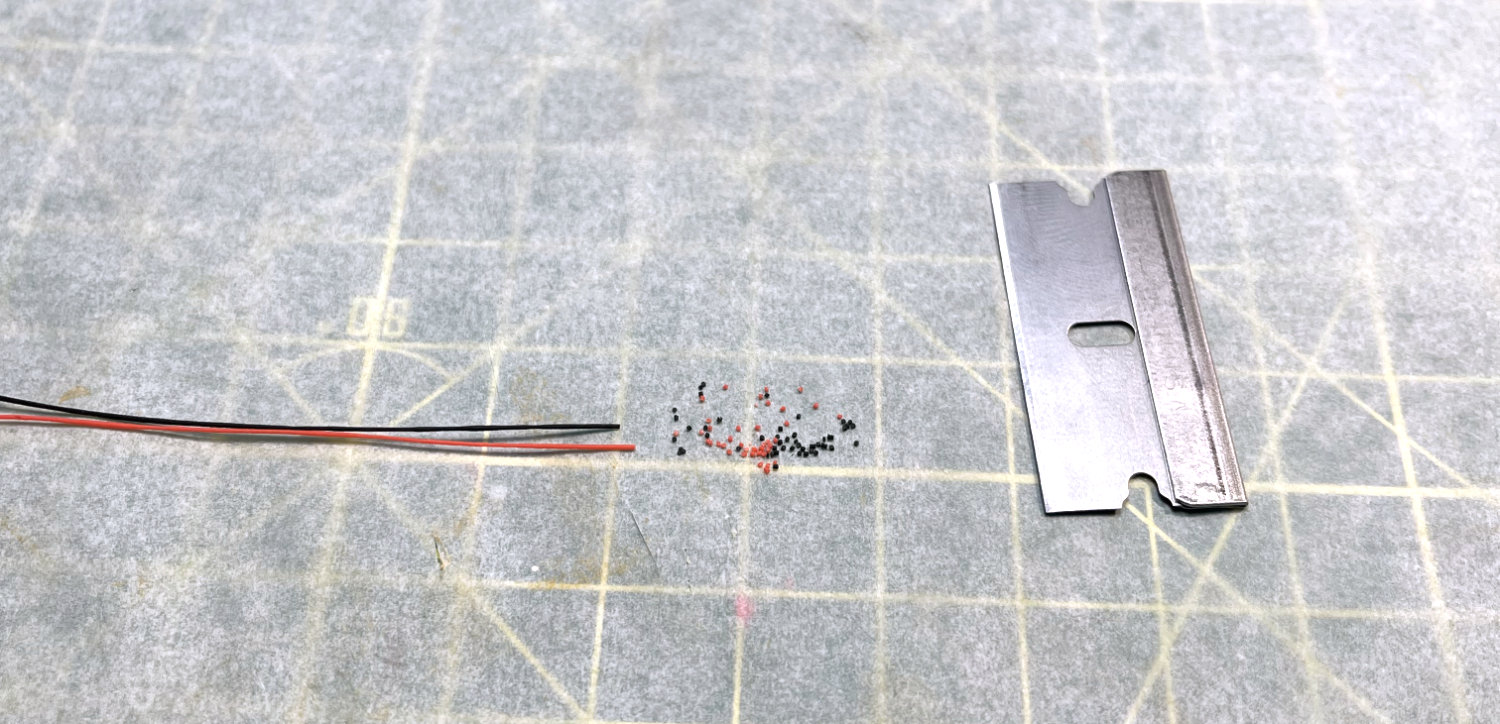
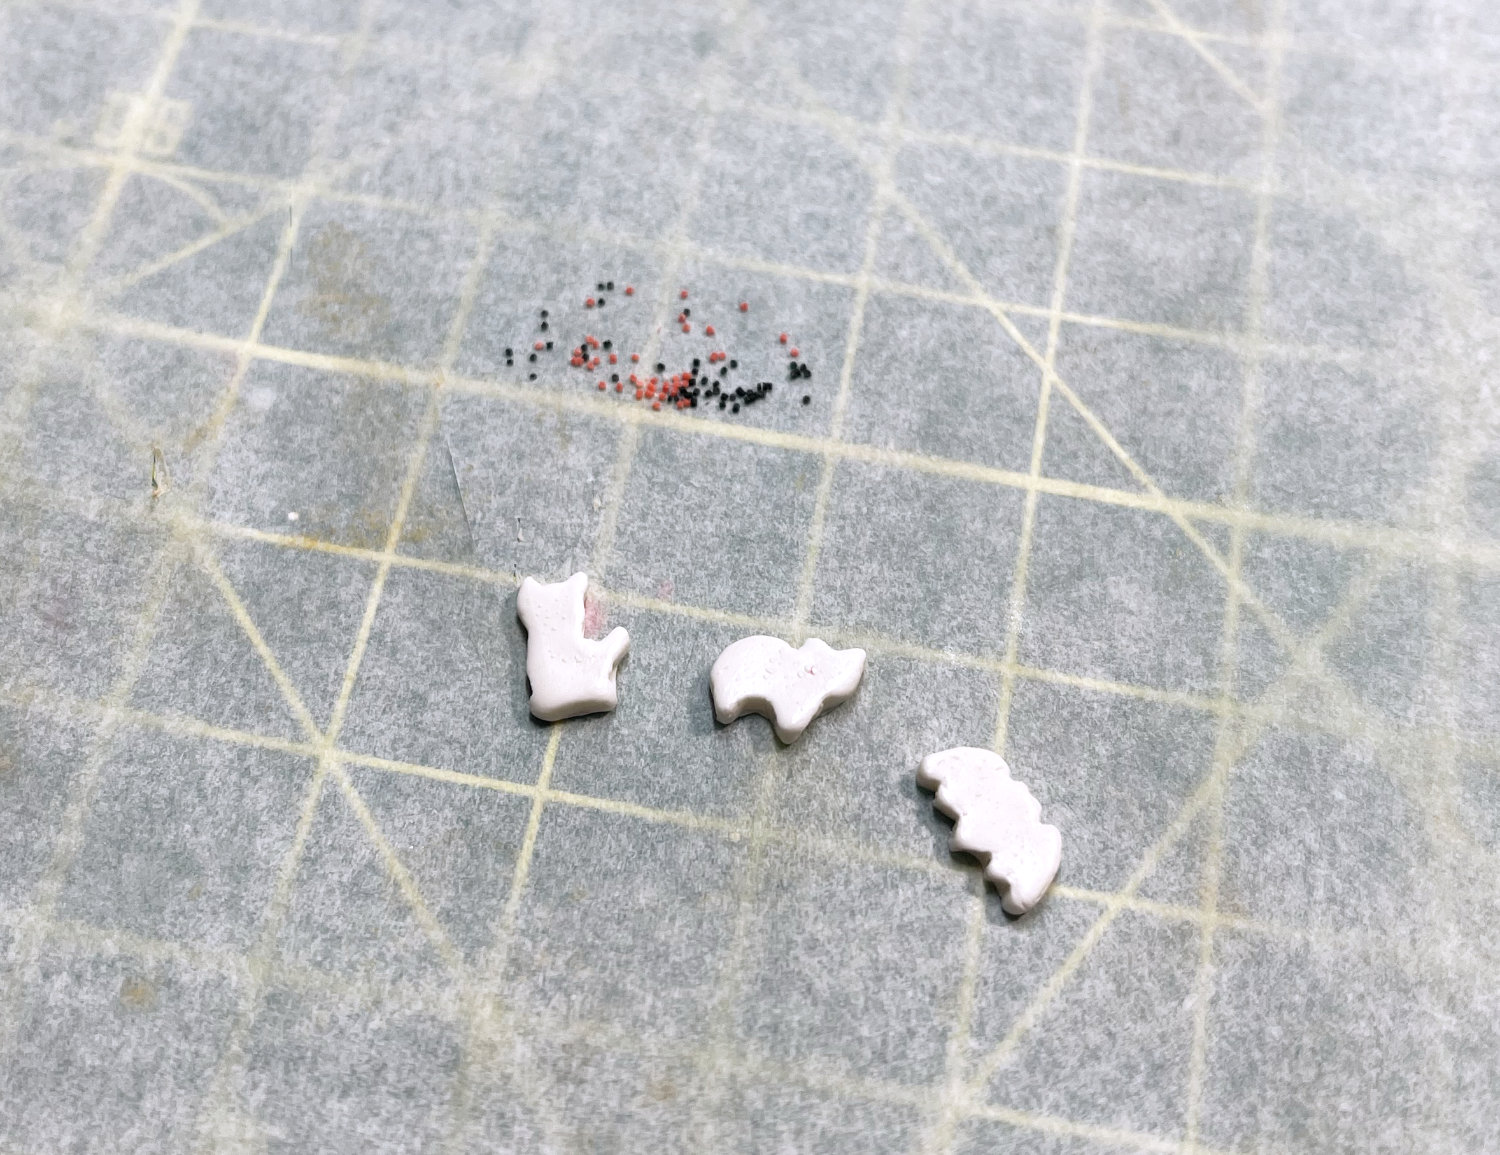
Roll out the clay colors of your choice (here, I’m using orange and black) into very thin snakes.
Place the snakes on a ceramic baking tile (you can buy a cheap floor tile from the hardware store) and bake in a preheated oven for five minutes (check your clay package for the correct temperature).
The ceramic tile prevents the clay from burning, which it often will if placed directly on a metal sheet pan.
Once cool, use the razor blade to slice each snake into tiny pieces, creating the sprinkles.
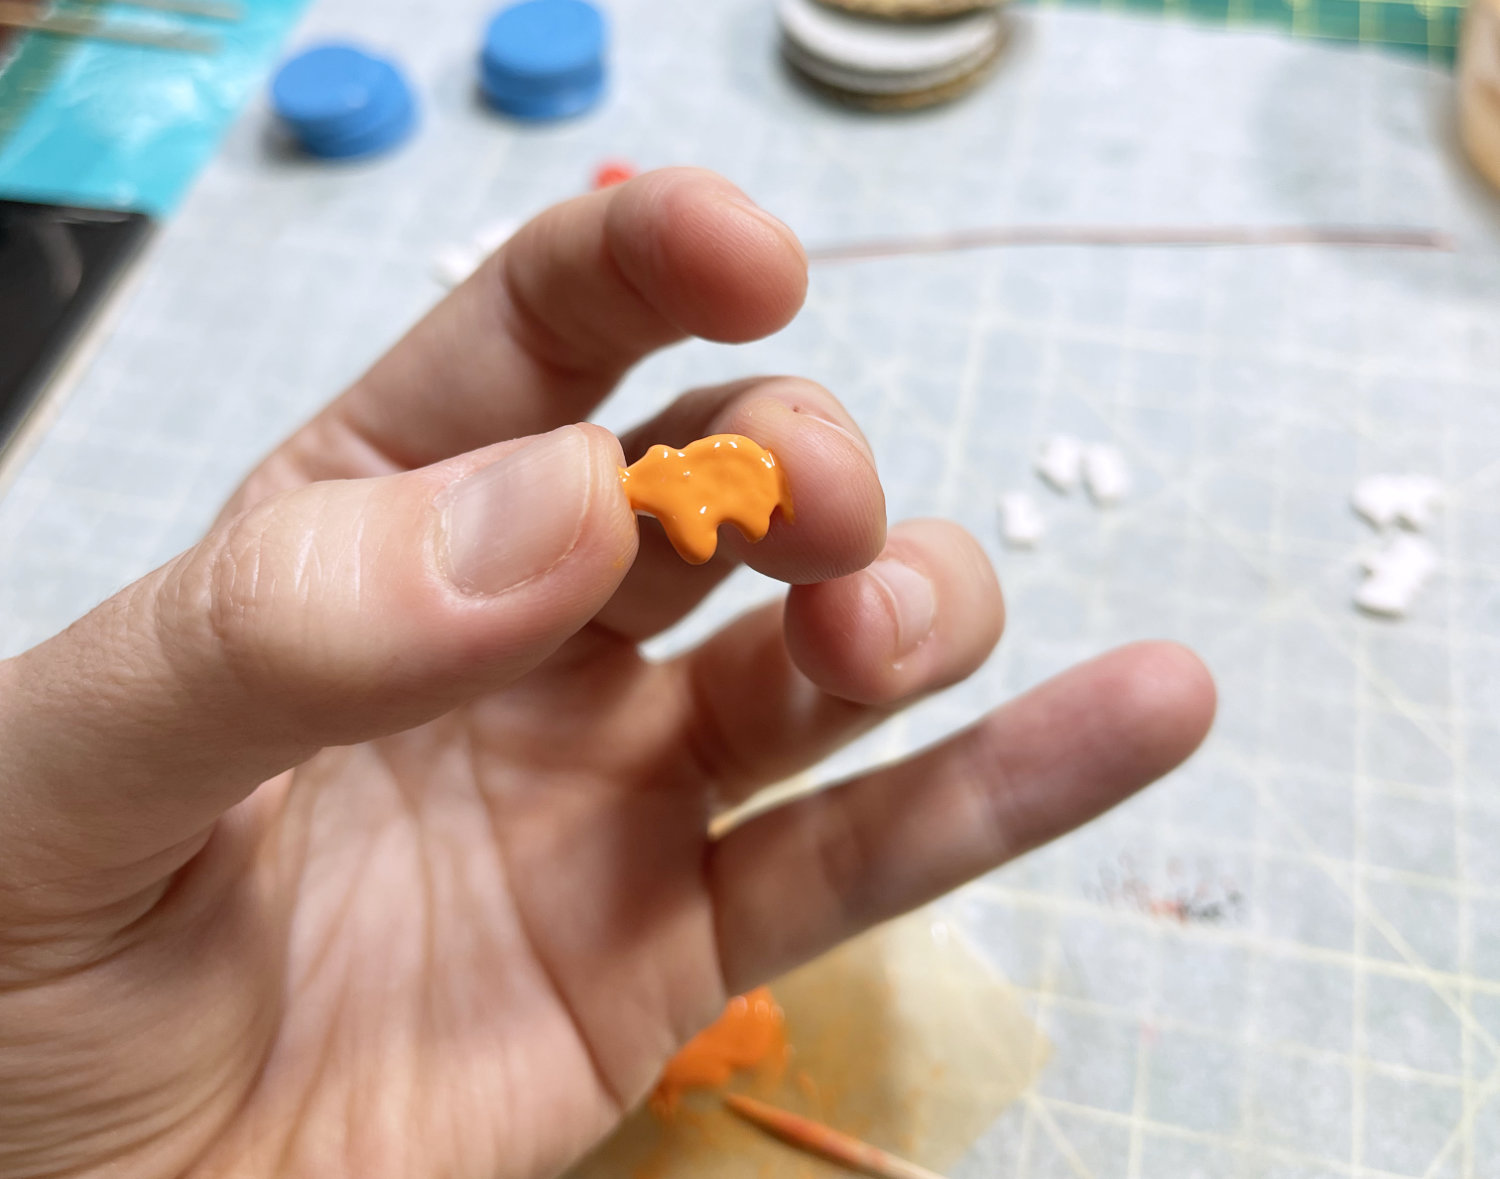
Prepare the frosting:
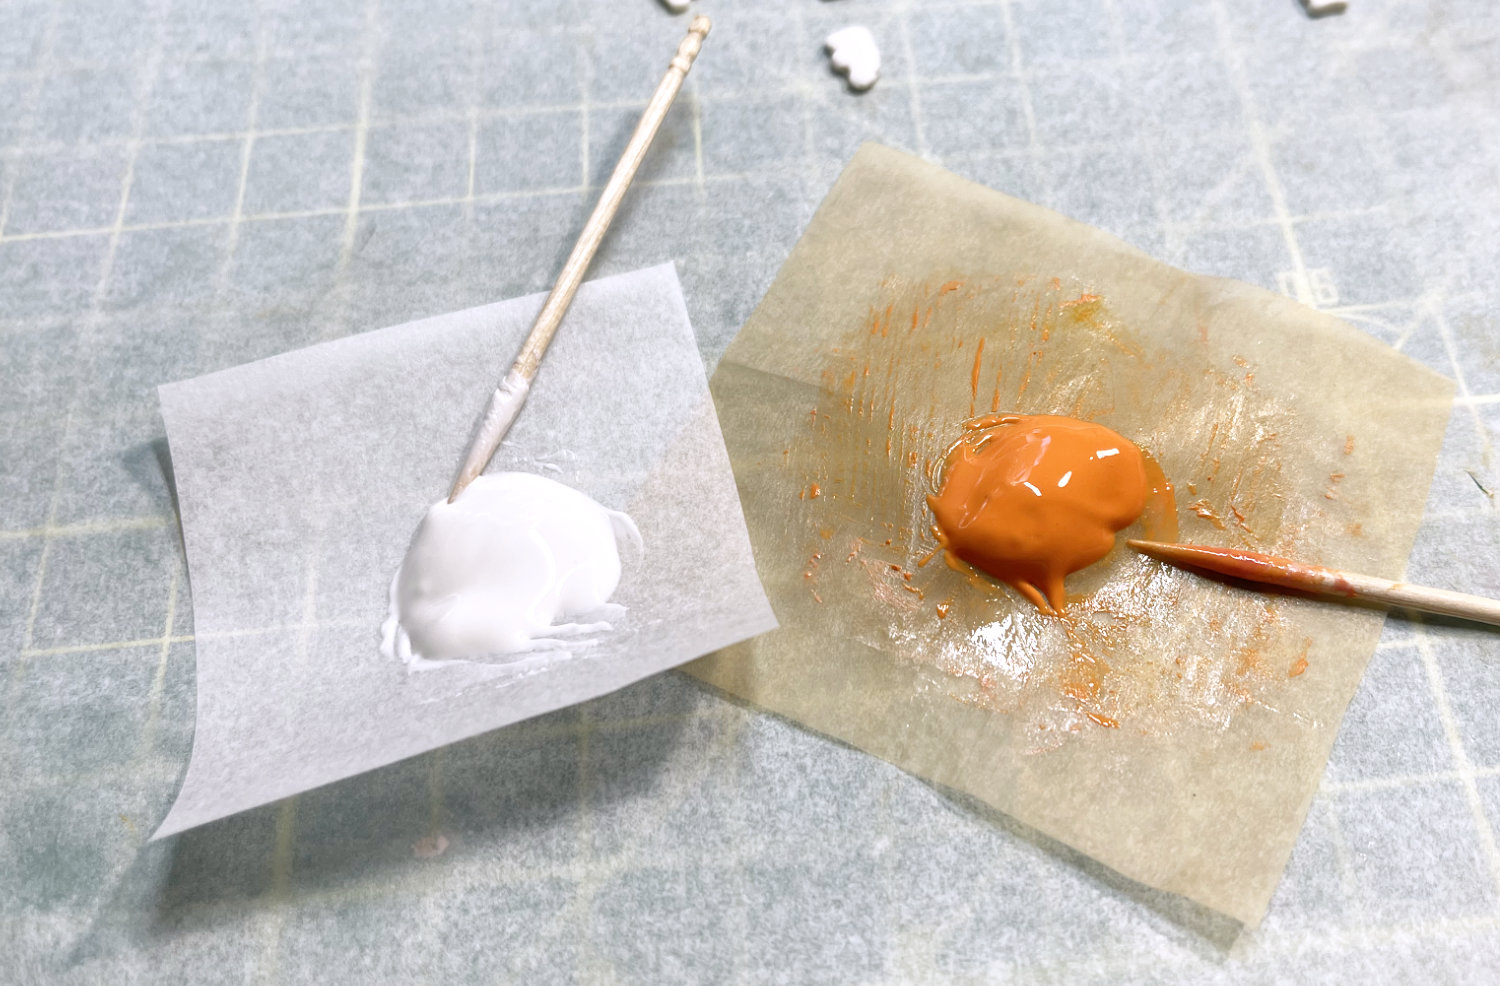
Take a chunk of solid clay and chop it into little pieces, placing them in a bowl. (I use a plastic watercolor mixing cup, and I use it only with polymer clay.)
Note: You can use any white polymer clay, but if you make frosting regularly, it’s worth getting a block of Sculpey Original. It has a softer consistency that’s much easier to mash into a paste when making frosting.
Squeeze roughly an equal amount of liquid translucent clay into the bowl (you can eyeball the amount), then use the popsicle stick to smear and mash the solid and liquid clays together, forming a paste.
If needed, add more liquid clay to thin the mixture. It should be smooth and slightly runny. If you take up a dollop of frosting onto the popsicle stick and let it fall back onto the mixture, the ribbon it leaves should be reabsorbed and disappear.
Set some of the mixture aside for the white frosting.
To create colored frostings, take a stick of chalk pastel and use the razor blade to grate some of the pigment off the stick, using a toothpick to stir it into the frosting mixture. Add more pigment as needed to create the desired color.
Make the cookies:
Place a small ball of solid clay (see note below for color tips) into the mold cavity, pressing it firmly to fill the entire shape.
Flex the mold to release the cookie. (If it’s sticking, place the clay-filled mold in the freezer for a few minutes and try again; the cold clay should pop right out.)
Note: If you have clay colors that match your frosting, make the cookies with that. Then, if you miss any spots when frosting them it won’t really show! This is especially useful if you’re making the 1:12 scale version, which are really tiny and trickier to frost.
To make the cookies easier to ice, bake them in a preheated oven (be sure to use your ceramic tile) for three minutes and let cool.
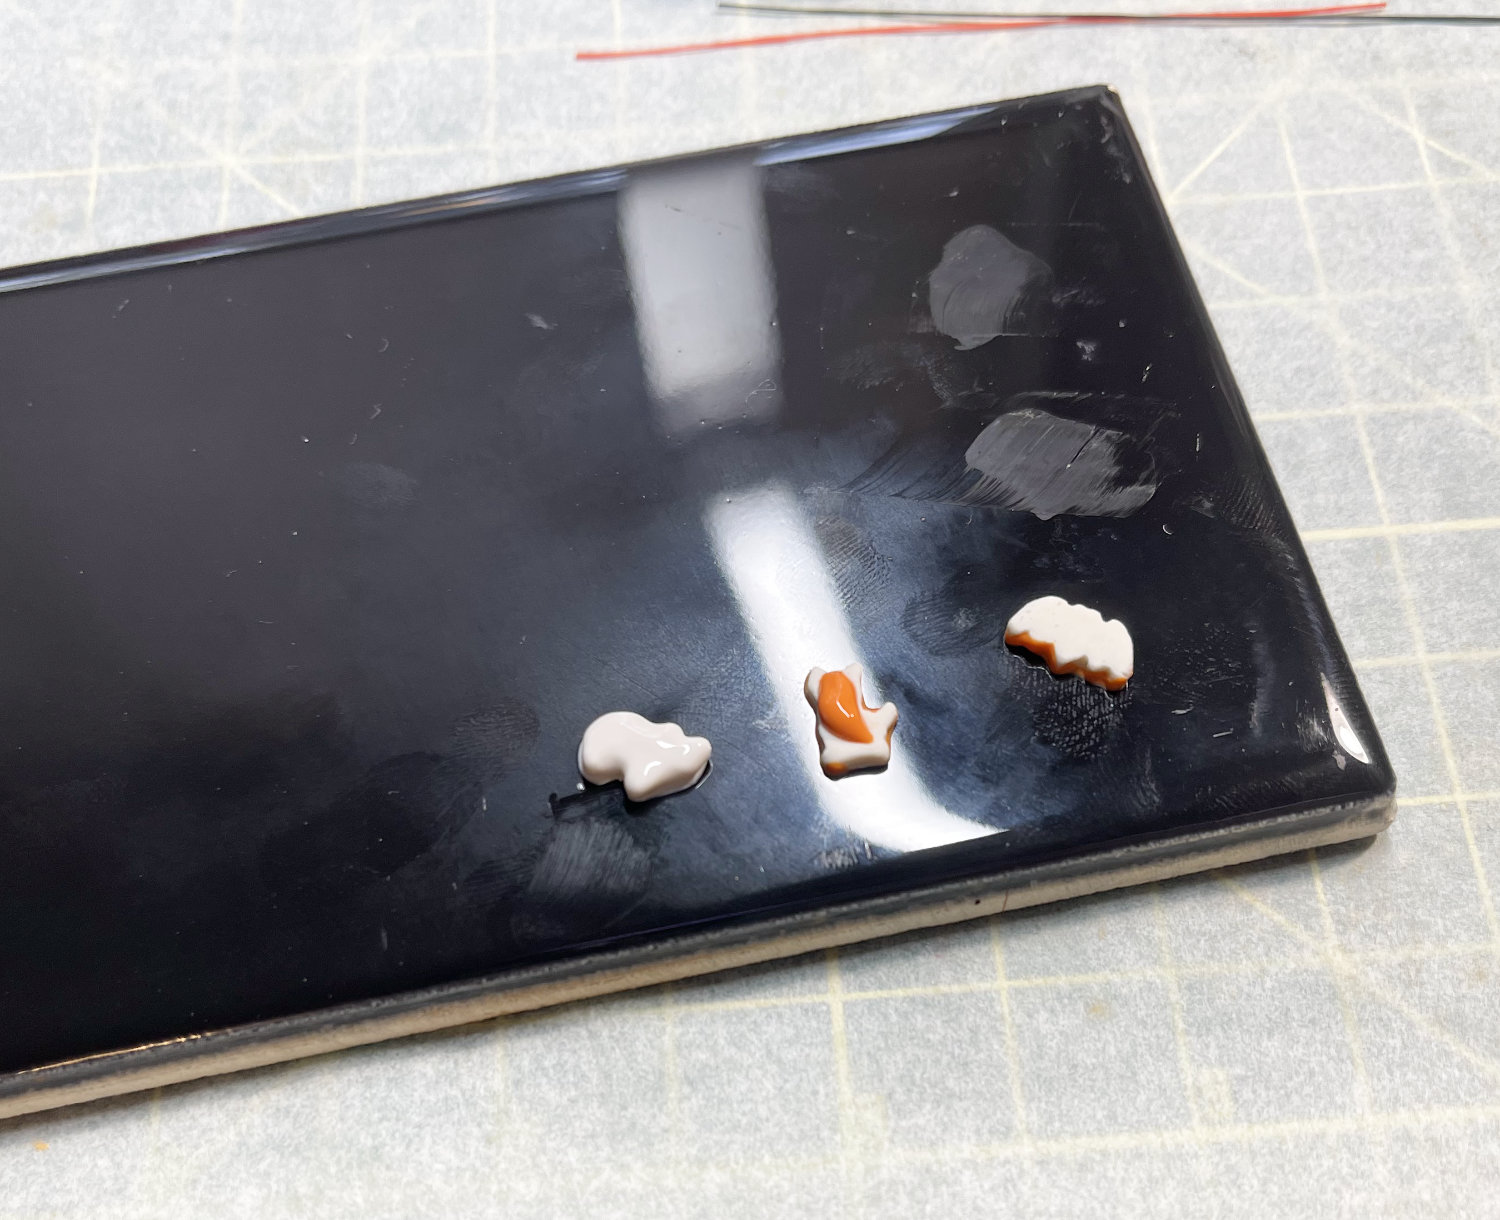
Now, you’re going to ice the bottom of the cookies first, and you’ll use that icing as a temporary glue, anchoring the cookie to the ceramic tile so it’s easier to frost and decorate the top in a later step.
Take a small dab of frosting onto a toothpick, and spread it on the underside of the cookies in a thin layer. Carefully place each cookie onto the glazed (glossy) side of the ceramic tile.
Bake the cookies in a preheated oven for three minutes. Leave them attached to the baking tile so they’re easy to frost.
Frost each of the cookie tops, making sure to carefully coat the sides of the cookies (you might need to switch to a needle tool if your toothpick isn’t precise enough) so that the cookie is entirely covered in icing, then take a little pinch of sprinkles and add them on top.
If you find some spots don’t have enough sprinkles, you can take a needle tool and dab the tip in translucent liquid clay (just a little bit!), and use it to pick up sprinkles and deposit them on top of the cookie.
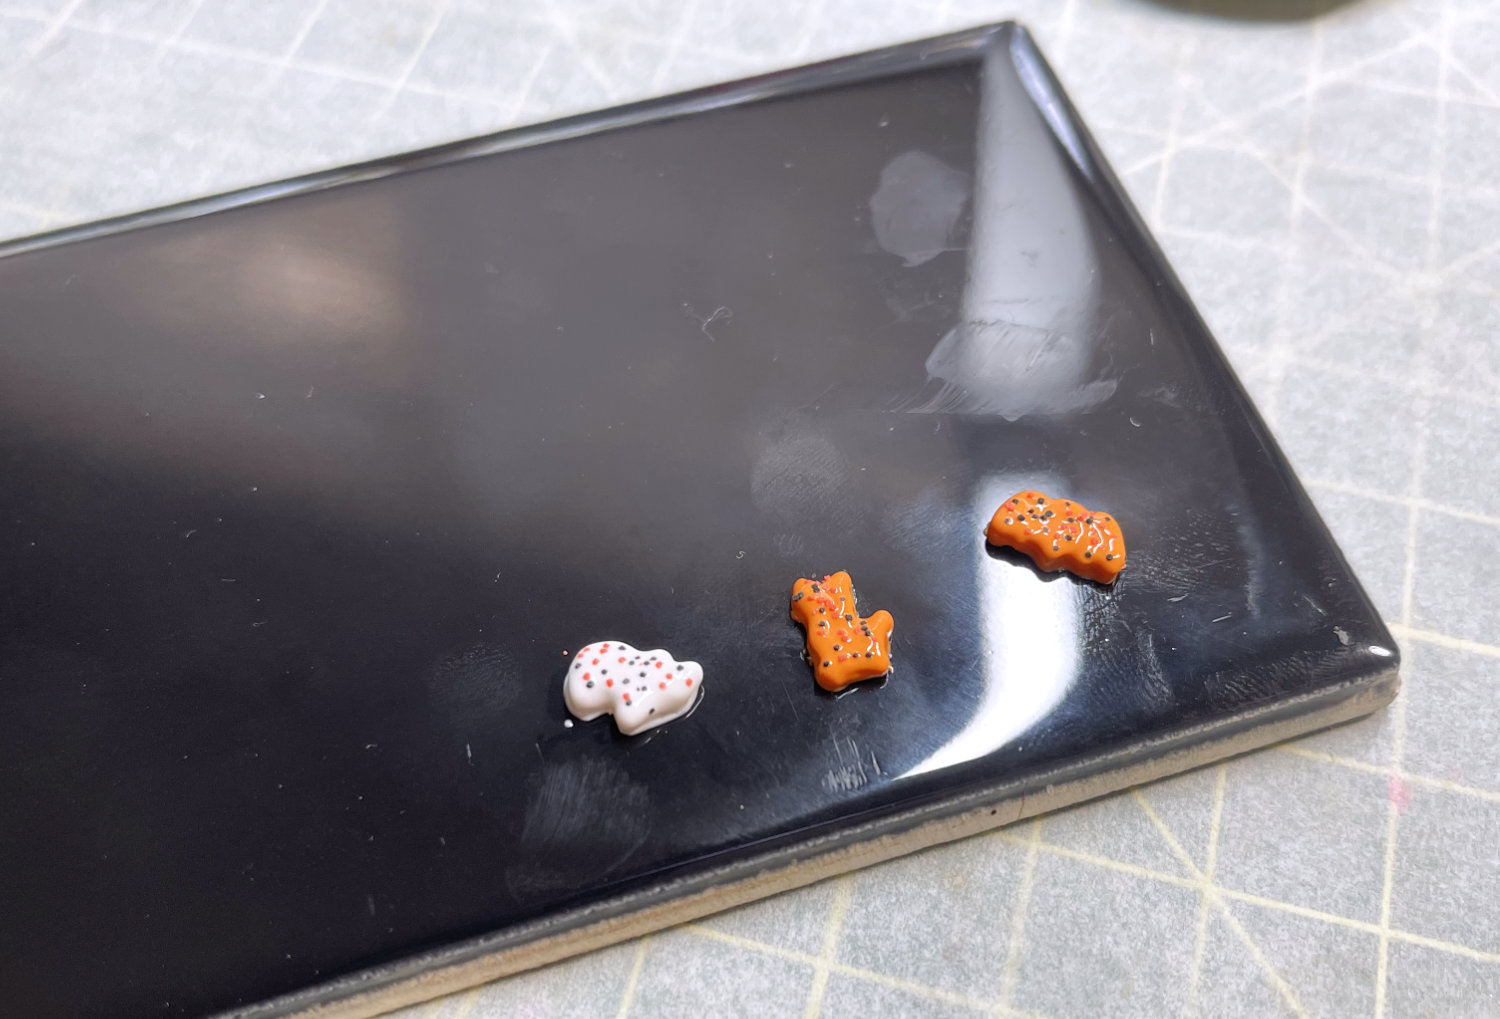
Bake the cookies in a preheated oven for four minutes and let cool.
That’s it! Carefully slide a razor blade between the cookie and the tile to release it, and your cookies are ready to go. 🙂
Want more mini tutorials?
Sign up for my newsletter here to access my library of free tutorials!
I also have an entire selection of detailed, full-color tutorials here, including a boxed set of miniature baking-themed titles.
I also have a wide assortment of Halloween tutorials and cookie molds right here.