Today has been a messy day in the studio, and I’ve finished staining the shingles for my dollhouse using one packet of dark grey shingle dye purchased at Hobby Lobby. I also picked up a bottle of Aleene’s Tacky Glue, which is what the dollhouse kit instructions recommended for gluing all but the shingles. So far, my total spent is:
- Victorian Alison Junior Dollhouse Kit = 79.98 (40% off the regular price of 129.99, thanks to a coupon)
- One bag of shingle dye = 8.99
- One bottle of Aleene’s Tacky Glue = 2.47
- Total: 91.44
I’ll continue to tally up my costs throughout the process for those of you who are considering building a dollhouse of your own.
Before I purchase paint to finish the exterior walls, which is the next step, I’m going to wait for the shingles to dry so I can bring one with me to the store to make sure the color complements my paint choice. So, how did I stain them? There are simple instructions on the back of the dye package, which I followed like so…
Staining the Dollhouse Shingles
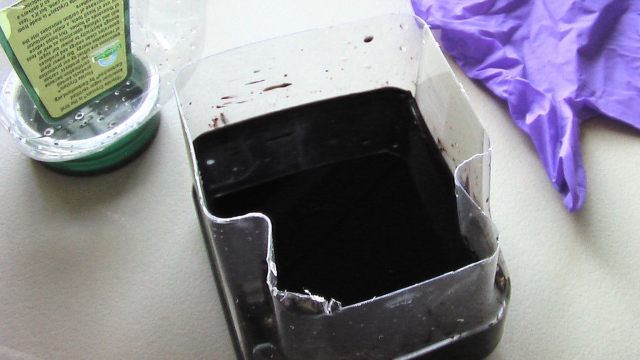
First, I took an empty plastic sugar container (the instructions recommended a milk gallon, but we’re non milk drinkers here), and I cut it in half so that one half had a solid bottom and the other had a lid, which could be opened to drain the dye mixture. I prepared my dyeing area by assembling all of the necessary supplies in a low-sided cardboard container, just to ensure that I didn’t get dye all over my work surface (you’ll see a photo of it at the end). Layers of newsprint would work, too. The kit only comes with one glove, so you’ll definitely want to buy a second one, and make sure you’re wearing grubby clothes. Last but not least, don’t keep any of the other dollhouse parts close to your dyeing area, because you don’t want to splash them as you work!
Next, I mixed the dye powder with 1 1/2 cups of water in the solid-bottom half of the plastic container with a wooden stir stick, and I took a handful of shingles and added them to the mixture, moving them around with my gloved hand to ensure that all of the shingles were coated with dye. A few notes: You might want to wear a face mask while mixing the dye; it stinks somewhat, and I can’t imagine that it’s healthy to breath it in. Also, I was a little obsessive about separating each and every shingle with the first batch to ensure that all of them were evenly coated, but I found that this was unnecessary. You do want to make sure that all of the shingles get submerged in the dye, and then you can mix them well with a gloved hand, but you don’t need to inspect each one individually.
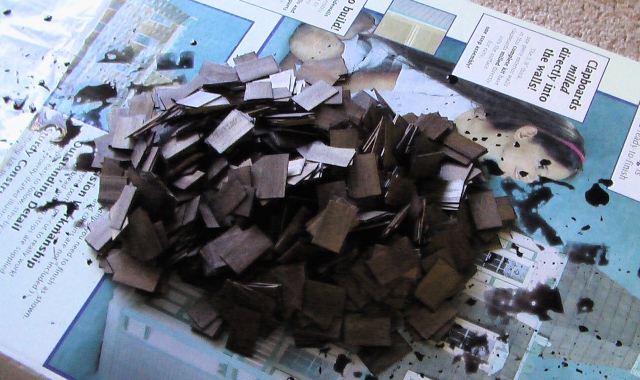
I then took the other half of the plastic container with the lid open at the bottom, and, holding it over a measuring cup, I dumped the shingles and dye into it so that the dye drained into the cup through the open lid. The shingles were then dumped out onto the now empty box that my dollhouse kit was packaged in, and I let them mellow in a little mound for one hour. The instructions specify that the longer you let the shingles steep in this pile (up to one hour), the deeper the final color will be.
I repeated this process with the rest of the shingles, pouring the dye from the measuring cup back into the closed half of the container, dumping a new handful of shingles into the dye, etc. The last batch of shingles requires a little more manual tossing, since there’s less dye to work with, but there was still plenty of stain to finish all of the shingles that came with the kit. The leftover dye was poured into an airtight container, labeled, and put in the fridge for touch ups. Below you can see the cardboard container I used while staining. What’s handy is that, not only did it keep me from splashing dye on my work table, but after I was finished, I could carry everything over to the garbage or recycling bins for disposal without having to worry about dripping dye on the carpet.
After the hour is up, I’ll spread the shingles into a single layer and let them dry for four to five days, stirring them occasionally to make sure that they don’t stick together. I’ll be sure to post pictures of the finished shingles in about a week. In the meantime, I’m going to sketch a plan for the interior of the house so I can decide which wall finishes I want to use for each room. Then, it’s time to do the interior painting, and once I have a dry shingle to use as a color guide, I can purchase my exterior paint and finish the outside house painting as well. Can’t wait!


