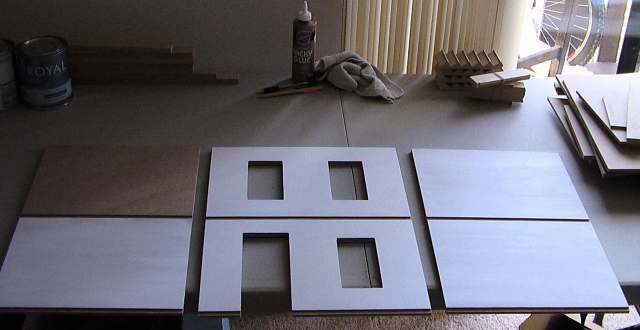
To start, the instructions recommended that I use a knife to square off the slightly rounded corners of the windows and doors, and that went remarkably fast, because the wood, while being quite thick and sturdy, wasn’t nearly as hard to cut into as I thought.
Next up, I painted all of the exterior walls, which brings us to another cost tally (see the first tally here). So far, I’ve spent:
- amount from last tally: 91.44
- Two quarts of paint and a paintbrush: 26.47
- One bottle of craft paint: 1.99
- Total: 119.90
After painting, I laid the walls out so I could visualize which sides corresponded to the second floor bedroom, the interior of which is the only room I needed to paint in a color other than white, so locating it was important.
Then, I went back and painted all of the interior walls, leaving the future non-white bedroom bare for the time being.
The floors were also painted white.
I then had to paint the second floor bedroom in the appropriate color, and I used Martha Stewart’s craft paint in pool with a satin finish. That room only needed one tiny bottle of paint.
The exciting part came after the paint dried, because it was finally time to start assembling the walls. To begin, I tested the fit of the two side walls with the middle floor, and after I determined that they fit properly, I applied glue to the appropriate grooves, lined up the pieces, and pushed them into place. It took a bit of gentle force to get the floor to pop into the wall grooves, and I wiped away excess glue before taping all of the pieces together very, very tightly with masking tape. The tape holds all of the pieces flush while the glue dries. After the side walls and middle floor were glued and taped, I repeated the process with the base floor and left the house to dry overnight.
The following day, I tested the fit of the right front of the house, and then I glued it in place, again using plenty of tape to make sure the wall and the floors were flush with the front
I’ll admit, when I first opened the dollhouse kit and saw the million and one pieces, I thought that it would take me forever and a day to complete the house, but it’s coming together much more quickly than I thought. Having a devoted work space definitely helps, because I don’t have to put everything away after each work session, and I’ve been scheduling time every day to devote to the house to keep my momentum going. Tomorrow, I’ll show you more pictures of the dollhouse assembly, so be sure to meet me back here on the blog!


July 6, 2018 at 2:34 am
Hi, what wood did you use for the exterior walls? I love that wood look!
July 13, 2018 at 10:31 pm
Hi Tee, the pieces are from a dollhouse kit by Real Good Toys. I think the wood is some kind of molded particle board.